How to Make Vinegar From Home: Effective Tips
How to Make Vinegar From Home. Vinegar stands out as a multi-use staple in many homes known for its cooking, cleaning, and health uses. You can easily find different kinds in stores, but making your own vinegar lets you make new flavors and use extra fruit or wine you have. This walkthrough shows you how to whip up your own tasty and safe vinegar right at home.
Getting the Hang of Vinegar Making
Creating vinegar happens in two key steps:
- Alcoholic Fermentation: This is where yeasts turn fruit or grain sugars into alcohol.
- Acetic Acid Fermentation: Next, Acetobacter bacteria get to work changing the alcohol into acetic acid, which is basically what vinegar is all about.
You can tap into this awesome change using stuff from the kitchen and basic gear.
Stuff You Need
To kick off making your own vinegar, here’s what you’ll need:
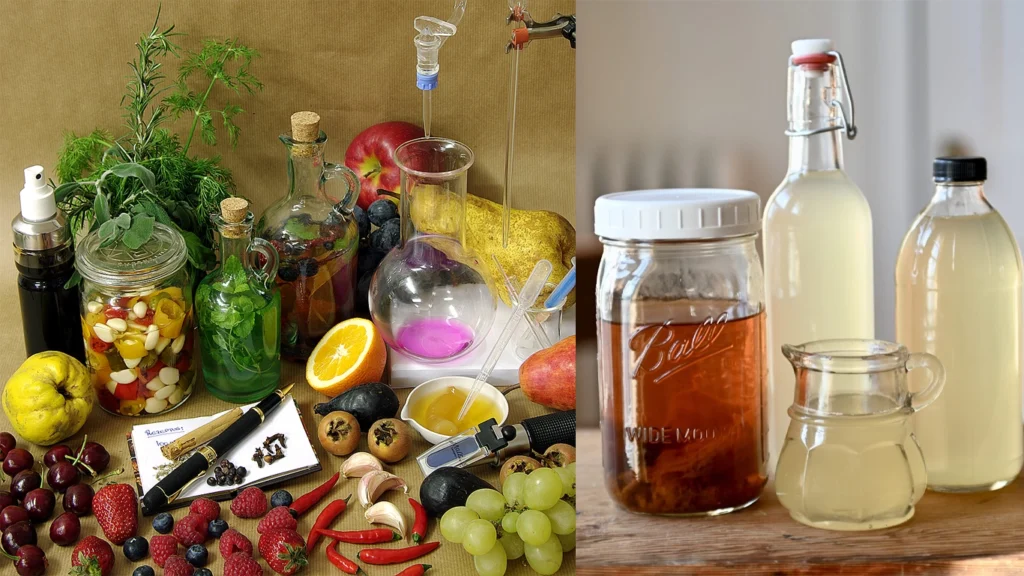
- Main Component: Pick between leftover pieces of fruit such as apple skins and seeds, fruit liquids, or unused wine.
- Sweet Stuff: Add this when using untouched fruits as it helps with the fermentation.
- Liquid H2O: Use water that’s been purified or doesn’t feature any chlorine so it won’t mess with the tiny life doing the work.
- Kickstarter: Gotta use vinegar that’s raw, unfiltered, and packs the “mother”—it’s full of friendly microbes and fungi and gets the party started.
- Jar of Glass: Opt for one with a big opening on top to let the air in just right.
- Thin Fabric: This bad boy goes over the jar to let air slip in but keeps the nasty stuff at bay.
- Elastic Loop: This little dude makes sure the fabric stays on real tight.
Vinegar Creation Steps One by One
1. Get the Foundation Ready
When You Use Fresh Fruit:
- Picking ’em: Go for ripe ones that don’t have chemicals.
- Washing ’em up: Make sure to clean ’em well to get all the grime and bad stuff off.
- Cutting ’em down: Make small chunks to help with the fermentation process.
If You’re Using Leftover Fruit Bits:
- Save up your organic fruit peels and the middles.
- Check ’em to be sure they’re not dirty or spoiled.
When You Pick Wine:
- Go for an organic one that doesn’t have sulfites, so it doesn’t mess with the fermentation.
2. Kick-off the Booze-making
Whether It’s Fresh Fruit or Just the Bits:
- Jumble Up Fruit: Toss chunks or bits of fruit into your jar. Stop when it’s ¾ full.
- Sweeten the Mix: Melt a tablespoon of sugar for each cup of water and drizzle it on the fruit till they’re all dunked.
- Get it Started: Plop in a spoonful or two of raw vinegar for good microbes.
- Tie it Down: Wrap the jar’s mouth with cheesecloth and pop on a rubber band to keep air coming in.
Make Some Wine:
- Just pour some wine into that jar.
- Drop in raw vinegar for a jumpstart.
- Wrap the top with cheesecloth and make sure it’s tight.
3. Watching’ Fermentation
- Location: Keep the jar somewhere dark and warm (60-80°F or 15-27°C).
- Duration: Let it ferment for 3-4 weeks and stir it every day so it gets enough oxygen.
- Progress Markers: If you see bubbles, that means it’s fermenting , and you might notice a goopy “mother” layer forming on top.
4. Switching to Acetic Acid Fermentation
- Checkup: You should be smelling a kind of soft alcoholic scent after the first round of fermentation.
- Getting Air In: Keep stirring it once a day because those acetic acid germs need that oxygen.
- Time Frame: This part can take another 3-4 weeks.
5. Testing and Getting It Just Right
- Taste Test: When you catch a whiff of that vinegary smell, take a sip. If it zings your tongue, it’s good to go.
- Straining: Get rid of the chunky bits and keep the mother aside for the next round of vinegar magic.
- Bottling: Pour the vinegar into clean bottles and lock it down tight.
6. Aging (Optional)
- Enhancing Flavor: Give the bottled vinegar a few months of downtime in a chilly shadowy spot to smooth out and round out its tastes.
Tips for Making Awesome Vinegar
- Clean Machines: Make sure to sterilize all your gear so you keep the bad microbe dudes at bay.
- Skip the Metal: Stick to using stuff like glass, plastic, or wood for your tools; metal’s no good with the sour vibes of vinegar.
- Chill and Wait: Fermenting’s got its own timetable, so just let things roll on their own time.
- Stash it Right: Put your finished vinegar stash in a chill, shadowy spot to keep it top-notch.
Watch Out for Your Well-being
- Keep Mold Out: Spot some mold? Better to chuck it all out than mess with your health.
- Acid Check: DIY vinegar’s got a wild side with its acid levels so don’t use it to keep food unless you’ve checked that the acid’s all clear.
Rocking That DIY Vinegar
You’ve got tons of ways to use your own zesty vinegar brew:
- Kitchen Wizardry: Whipping up dressings, soaking stuff in marinades, and boosting taste big time.
- Tidy-Up Magic: It’s like a wonder wash for wiping down counters.
- Wellness Potion: A bunch of folks sip on watered-down vinegar hoping for health miracles.
Conclusion
DIY vinegar-making is super cool because it takes basic bits from your kitchen and turns ’em into this mega-useful thing you’ll want to use all over the house. Just keep things clean when you’re mixing it up, and you’ll craft a vinegar that’s all about your flavor vibes.
Note: I’m just sharing some brain candy here. If you gotta get the real lowdown on making and using vinegar, hit up the pros or dig into some serious sources, ‘kay?